This post will guide you through the setup process for setting up a scheduler in Google Cloud with RStudio. I will also show you two use cases for what data you can import to Google BigQuery; Google Analytics (free version) and Google Search Console. If you manage to get this to work then I bet you can figure out how to do other imports as well, perhaps Smartly, Shopify, Twitter, YouTube etc. Since it's a bit much information I have split this into two different posts. This part will show you how to get the machine up and running in Google Cloud. The next part will show you what the code looks like to import the data and how you can schedule it in the virtual machine.
The first section will show you how to create a Google Cloud account. If you already have a Google Cloud account you can skip this section.
Setting up Google Cloud and APIs (free)
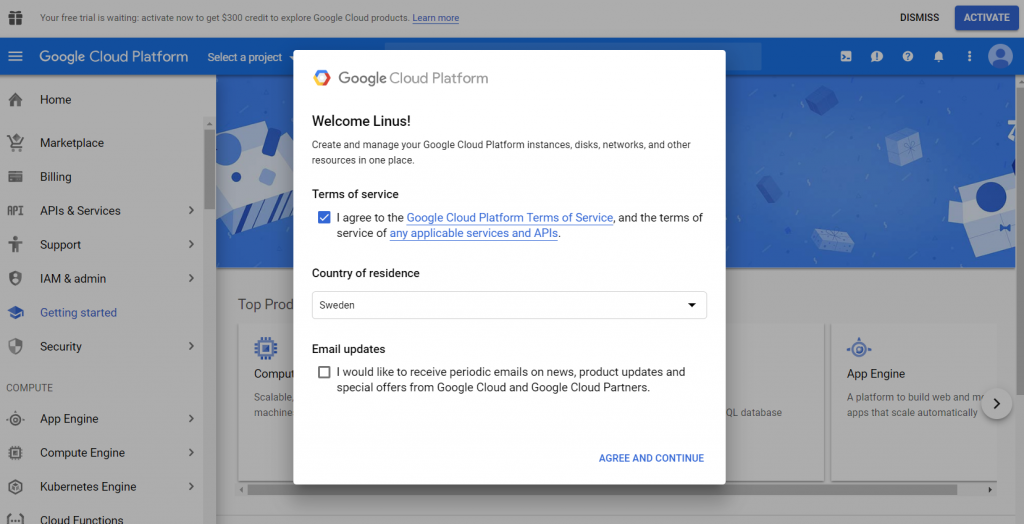
Head to Google Cloud and log in to your Google account. Make sure you accept the terms of service and pick the correct location.

In the top right corner you should be able to see an activate button. Click on that to activate your free trial of Google Cloud. The trial includes $300 which you will find out can be used for a long time. Google Cloud is pretty cheap if you're not doing large scaled stuff.
Notice that you have to enter your credit card! However, you will not be charged until you manually upgrade your account!
Now that you have your free trial you can head over to the project settings page. You should have access to a project called "My First Project". You can change the name on the if you want to.

Next up we're gonna head over to the API section of Google Cloud and make sure that the Compute Engine API is enabled. You should see the Enable APIs button in the top as in the image below. Click on it and then search for "Compute Engine API". When you click on it you should be able to see a status that it's enabled. Otherwise simply click on "Enable API" and wait a few seconds.

Depending on what data you want to collect you will have to enable some other APIs as well. Let's do that for Google Analytics, BigQuery and Search Console. BigQuery might already be enabled but check it anyway.
Enable API for Google Analytics
Enable API for BigQuery
Enable API for Google Search Console
Giving Google Cloud access to the applications
Now we have granted access for our project in Google Cloud to access Google Analytics and Search Console with the APIs. But in order for our project to be granted that access we will have to add it as a user in those applications. So how do we do that?
When a new project is created in Google Cloud there will automatically be a service account created for that project. That service account has a Google email associated with it. Simply add that email as a user in both Google Analytics and Search Console!
The email is created in the following format:
PROJECT_NUMBER-compute@developer.gserviceaccount.com.
You can see the project number in the settings page for the project (as shown in the second image of this post). Make sure you add that email as a user in both Google Analytics and in Google Search Console. Now we're ready to create our machine.
Creating a virtual machine in Google Cloud
There are a lot of different ways you can set up a virtual machine in Google Cloud. But the easiest way, at least for me, is to do it from RStudio. We will use one of many great packages that have been developed for connecting Google tools with R, a huge credit to Mark Edmondson!
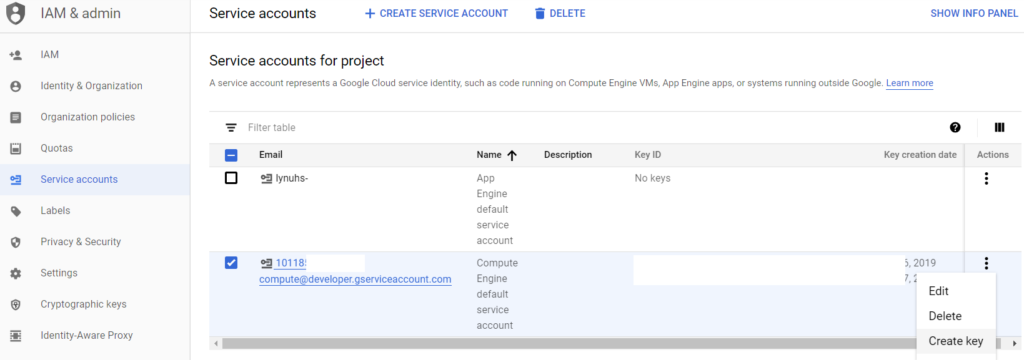
Before we can start coding though, we will have to get our service account keys in order to authorize the use of the APIs we enabled. Head to the section for service accounts under IAM in Google Cloud. To the right of your compute service account you can choose "Create key", as shown in the image below. Click on that, choose JSON and create.

Notice that you downloaded a JSON file to your computer. Move that file into the project folder in RStudio. If you haven't set up a project in RStudio then do that now. You could also choose to reference the file from the download folder, you're choice. MAKE SURE that you keep the file safe and don't share it with someone else!!!!
Let's head over to RStudio and create our virtual machine!
library(googleComputeEngineR)
library(googleAuthR)

auth_file <- "C:/Users/USER/Downloads/project-id.12345678.json"

options(googleAuthR.scopes.selected = c("https://www.googleapis.com/auth/cloud-platform"))
Sys.setenv(GCE_AUTH_FILE = auth_file)

gar_auth_service(auth_file, scope = getOption("googleAuthR.scopes.selected"))
Run these lines to install the compute engine package and authorize access to your project for RStudio by using the JSON file that you just downloaded. Simple, right?
The next part is to set the default variables that we will be using. We need to pick a project, a zone for our machine and an image tag that will be used to format our machine to be able to schedule scripts. If you are registered in the EU then you have to use a zone located within the EU area. You can use the same as me. The image tag is imported from a public project. It will install Cron on the virtual machine, which is essential to schedule scripts.
gce_global_project("project-id")
gce_global_zone("europe-west1-b")
tag <- gce_tag_container("google-auth-r-cron-tidy", project = "gcer-public")
Now all we need to do is send a command to Google Cloud to create a machine. This can be done with the following function:
vm <- gce_vm(name = "scheduler-always-on-2",
             template = "rstudio",
             username = "USER",
             password = "PASSWORD",
             predefined_type = "n1-standard-1",
             dynamic_image = tag)
The attributes above are pretty straight forward. Make sure to pick a strong password! The "predefined_type" variable is used to decide how many CPUs and how much memory the machine will be using. There are a lot of different predefined types to choose from and make sure to pick something in the level you need. If you're only gonna be running simple functions that won't handle a lot of data then go for a smaller one. The more CPUs and the more memory the more it will cost you. When you run the code you should get the following messages:

As you can see above we get an external IP address which we can now visit to access our machine. But wait a minute or two before you try to access it since it needs to install the docker container (image tag). If you don't want to type in the IP address you can run the following code from R:
browseURL(paste0("http://",gce_get_instance(vm)$networkInterfaces$accessConfigs[[1]]$natIP))
Once you've logged in you'll see RStudio in the exact same interface as you're used to. Pretty great right?

Make sure you check out the next part of this post in order to add the actual code for importing data and storing it in BigQuery on a daily basis!

Comments